- High powered 280,000mcd 10mm leds (60" wires)
- Flush mount led holders OR led chrome mounts
- Lighted led toggle switch with JST connections
- Heavy duty 9 volt snap (6" wire)
- Zip-ties


Check out these video for the product in action!
You choose which lights flash.
The only limitation is your mind!
10MM $ PRICES $
6 LEDS $16 - 8 LEDS $20 - 10 LEDS $24
12 LEDS $28 - 14 LEDS $32 - 16 LEDS $36
18 LEDS $40 - 20 LEDS $44 - 22 LEDS $48
24 LEDS $52 - 26 LEDS $56 - 28 LEDS $60
Add $7 to your order if you would like the flashing system.
**FREE SHIPPING**
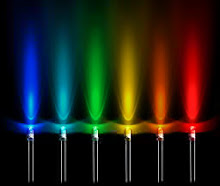
The 10mm leds are 18 times brighter than 5mm leds
_________________________________
YOU CHOOSE THE COLORS
WHITE, RED, YELLOW, ORANGE, AND BLUE
__________________________________
5MM $PRICES$
You choose which lights flash.
The only limitation is your mind!
10MM $ PRICES $
6 LEDS $16 - 8 LEDS $20 - 10 LEDS $24
12 LEDS $28 - 14 LEDS $32 - 16 LEDS $36
18 LEDS $40 - 20 LEDS $44 - 22 LEDS $48
24 LEDS $52 - 26 LEDS $56 - 28 LEDS $60
Add $7 to your order if you would like the flashing system.
**FREE SHIPPING**
The 10mm leds are 18 times brighter than 5mm leds
_________________________________
YOU CHOOSE THE COLORS
WHITE, RED, YELLOW, ORANGE, AND BLUE
__________________________________
5MM $PRICES$
6 LEDS $12 - 8 LEDS $15 - 10 LEDS $18
12 LEDS $21 - 14 LEDS $24 - 16 LEDS $27
18 LEDS $30 - 20 LEDS $33 - 22 LEDS $36
Add $7 to your order if you would like the flashing system.
**FREE SHIPPING**
___________________________________
YOU CHOOSE THE COLORS
WHITE, RED, BLUE, YELLOW, PURPLE, GREEN, ORANGE, PINK
___________________________________
We do have an optional motor connection instead of the 9 volt source. The switch is hooked
to the hook-ups on the motor. The lights will only light up when the power is sent to the motor.
INSTALLATION FOR 10MM
Step 1: Locate on the vehicle where you would like the switch. Use the 3/4” forester drill bit. Install the switch in its proper hole. The dashboard is the best location.
Step 2: Locate throughout the vehicle where you would like your LEDS. Keep in mind where you are putting these holes so that your wires will not interfere with anything mechanical. For the headlights, they are best placed on a flat part of the vehicle, or facing down to the ground. Drill the holes using the 9/16” drill bit.
Step 3: The kit will come with different colors of LEDS. Decide what color of LEDS you are going to start with. Snip the zip tie that is holding them together. Unravel the wires of each LED. Start with one LED at a time. Weave the LED to the proper LED holder. If anything is in the way (such as the frame) drill a hole using the 9/16” bit until the LED is able to travel to its destination. Although the LEDS snap into the holders, we do recommend using a dab of glue for a tight fit.
This also makes it easier if you ever have a problem with the LED to take it out of its holder. Continue until you are done with all of the LEDS. Any LEDS that are traveling to the back of the vehicle should have the wires tucked up underneath the vehicle so that if the bottom of the vehicle is scraped it will not harm the wires.
Step 4: Once you have all of the LEDS in their holders you will need to pull the slack from the LEDS up to the dashboard or another convenient location such as under the seat. Wind the wires like they came and zip-tie them together in a nice circle. (Just like they came to you)
Step 5. Using hot glue, silicone, tape, or other forms of adhesive. Secure the wire to the shell.
Step 6. Using double sided tape or Velcro, secure the 9 volt battery to the shell of the car.
ALL WIRES COME WITH A STANDARD LENGTH OF 60 inches.